1.0 Introduction
Reeve is a Node.js boilerplate framework designed to reduce setup time, and mitigate risk when building scalable web applications.
Many web applications depend on commonly found, generic functionality. This can include -
- User authentication and account management.
- Payment and subscriptions.
- Routing and page management.
- Internationalization (translations).
- Security.
- Access and usage logging.
- Error reporting.
Reeve aims to provide a robust set of solutions to these areas (and more), so that the focus can return to rapid prototyping and feature delivery.
Using pre-packaged solutions to common problems found early in the development process, developers can focus on the core features of the product directly, and avoid building secondary functionality that is expected, but not critical of the primary product features.
Why would someone want this?
Developing a software product is expensive and time-consuming. By using a framework, you can ensure consistency and enforce commonality across multiple products being developed in parallel.
If you are outsourcing, you can reduce risk by standardizing how a product should be developed and enforcing practices that might not be used if you asked a developer to start from scratch.
2.0 Core Features
Reeve was designed to abstract away a lot of the common functionality found in web applications that doesn't directly contribute to the primary "solution". These features include -
User Accounts: Common utility pages for logging in, registering client accounts, sending emails when a user forgets their password, and verifying email addresses when new accounts are created.
Client Accounts: New user accounts are provisioned under a 'client'. A client is a group of users working together in an organisation. They can share resources and information, and collaborate with each other. The overarching client manages the subscription and payment handling for a group of users.
Client Specific Branding: Each client on the platform can have unique branding, and web address to access their resources. When a user navigates to a client page, they may see the client logo, background and colours specified by the client administrator.
Routing & Page Management: Pages on the platform can be restricted in their presentation, in a variety of ways. The developer can restrict pages to logged in, or unregistered users. They can require users to have a particular feature or role to view a page. Reeve handles the routing and page management to simply this process, and maintain security.
Translations: The email templates, front-end and back-end of the application support multi-language text translations with full i18n support. Clients can define a default language to display on the login page, and users can set a language specific to their account.
Subscription and Payment Gateway: Subscriptions are handled through a Stripe payment processor. When a new client is created, they are automatically placed on a 14 day trial period where they can use the app freely. After this period of time, they need to select a subscription and make ongoing payments to continue accessing the platform.
Feature Restrictions: The internal database and pages supports defining a series of features, and restricting them to certain clients or subscription types. Restrictions can be as granular as blocking objects on a page, to restricting access to entire routes/pages. An example of using this could include providing extra features to a client that is on a better subscription plan.
User Roles: User accounts can be assigned multiple roles which act as granular permissions to perform certain actions, view pages or objects.
Email Sending: Every user has an email address associated with their account, and the platform supports sending emails to them. These messages are structured using a translation-friendly templating system.
Session Management: An in-memory database is used to handle active user sessions for fast and efficient application performance.
Error Reporting: Activites, behaviours and system events throughout the platform can be recorded to external services such as Papertrail, or Sentry.
3.0 Technology Stack
Reeve relies on a variety of open source technologies to function. Key inter-connected services are listed in the table below with a short description of their purpose. It is strongly recommended that you review all the dependencies found in the package.json file in the root directory.
| Component | Dependencies |
|---|---|
| Front-End |
|
| Back-End |
|
| Database |
|
| Session Management |
|
| Development |
|
| Integration Testing |
|
4.0 Directory Layout
The Reeve directory layout is designed to be as simple and organised as possible. Most of the core application functionality is handled inside three directories.
- Client: Front-end content served to the user when using the application.
- Server: Code specific to the back-end and deployed on a node server/the cloud.
- Shared: Contains functions that are shared between both the client and server directories.
							root directory
							|____ client
							|____|____ api
							|____|____ common
							|____|____|____ components
							|____|____|____|____ inputs
							|____|____|____ layouts
							|____|____|____ media
							|____|____|____|____ icons
							|____|____|____|____|____ flags
							|____|____|____ store
							|____|____|____|____ reducers
							|____|____|____ styles
							|____|____|____|____ modules
							|____|____ modules
							|____|____|____ authentication
							|____|____|____|____ components
							|____|____|____ billing
							|____|____|____|____ components
							|____|____|____ overview
							|____|____|____ header
							|____|____|____|____ components
							|____|____|____ profile
							|____|____|____ settings
							|____ database
							|____|____ scripts
							|____ distribution
							|____|____ images
							|____ documentation
							|____ node_modules
							|____ server
							|____|____ controller
							|____|____ models
							|____|____ orchestrator
							|____|____ services
							|____|____ utilities
							|____|____|____ errors
							|____ shared
							|____|____ translations
							|____|____|____ countries
							|____|____|____ currencies
							|____|____|____ languages
							|____|____|____ links
							|____|____ utilities
							|____|____ validation
							|____ tests_integration
							|____ tests_load
A more detailed breakdown and explanation of each of the directories and their purpose can be found below. Compare these directories with the notes below to better understand their purpose.
root directory: The root directory contains the node package file for starting node, and a series of configuration and property files. An environment file config.env contains build configuration information. webpack.config.js handles the configuration of webpack, bundling and building the files when node is started. There are also a number of configuration files to be used with your code editor for code styling and formatting.
/client/: The client directory contains content that is bundled together during development and served to users. At the root of the directory there is an index.js file, this injects React into the web-browser dom. The app.js file loads the router and other dependencies. The router.js file handles the react routing (using react-router v4) throughout the application.
/client/api/: Exported js functions that call the browser 'fetch' function to communicate with the api endpoints on the back-end are stored in this directory.
/client/common/: Common front-end functions that are shared across multiple pages within the client application.
/client/common/components/: A directory for storing common react page elements.
/client/common/components/inputs/: Shared react input elements. Fields, checkboxes and drop-downs. The advantage of using a single field component throughout the application is that you can update once and the changes will be visible everywhere.
/client/common/layouts/: Every page is wrapped in a 'layout' component. This component defines whether a header, navigation bar or sidebar should be visible along with the page content.
/client/common/media/: Visual front-end components (usually SVG's').
/client/common/media/icons/: A central repository of icons used throughout the application front-end.
/client/common/media/icons/flags/: SVG country flags.
/client/common/store/: This directory contains a store.js file which loads the Redux application state store. In the development environment, it also contains code that loads the React and Redux development tools.
/client/common/store/reducers/: All the Redux reducers are stored in this directory. Reducers specify how the Redux application state changes in response to actions that are sent to the store.
/client/common/styles/: A single entry.scss imports styling files (Sass - Syntactically awesome style sheets) from the modules directory. Webpack compiles these files into pure css during development and production. Sass provides a significant number of benefits over writing pure css.
/client/common/styles/modules/: The most significant file in this directory is _bootstrap_variations.scss which specifies the default styling and colours of the bootstrap css framework.
/client/modules/: Pages within the web-application are separated into unique directories and loaded in an asynchronous fashion. If you are creating a new page, most of the content should be stored in a sub-directory within this directory. The first file to be loaded is a index.js file which contains a react-router component. This component handles what should be visible on the page.
/client/modules/authentication/: Contains all of the pages and components for authentication. This includes, sign-in, registration, forgot password, reset password and verify email. The react-router component in index.js determines which one of these components should be visible.
/client/modules/authentication/components/: Shared components that are used in a particular page or group of pages, but are unlikely to be required across the whole application, should be stored in a 'components' directory.
/client/modules/billing/: Pages and components for presenting billing and subscription management to the end user.
/client/modules/billing/components/: Shared components that are used in a particular page or group of pages, but are unlikely to be required across the whole application, should be stored in a 'components' directory.
/client/modules/overview/: The first page that is presented to a user when they sign-in to an account.
/client/modules/header/: A navigation header that is shared across multiple pages throughout the app. The visibility of the header is determined by its use in the layouts directory 'client/common/layouts'.
/client/modules/header/components/: Shared components that are used in a particular page or group of pages, but are unlikely to be required across the whole application, should be stored in a 'components' directory.
/client/modules/profile/: A directory containing pages where users can update their personal information and add a profile picture.
/client/modules/settings/: This directory contains pages for handling client specific settings that are applied to all users within the client account.
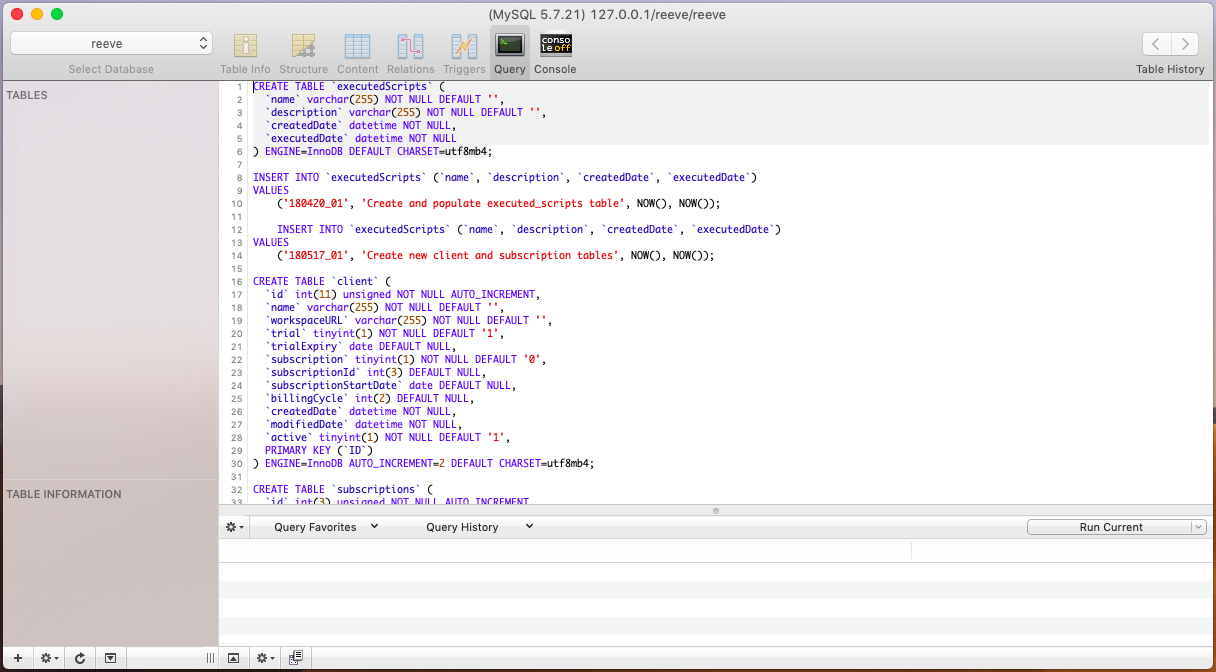
/database/: The root database directory contains a series of directories pertaining to building the mysql database. There is a readme file that explains how to run the sql installation scripts.
/database/scripts/: As the product is developed and the underlying database is changed, database scripts containing the changes are included in this directory. Scripts are chronological in order so when new changes are introduced, you only have to run the latest scripts.
All scripts used to make database changes should be documented in this directory.
Every script records
an entry
in the 'executedScripts' database table, so you always know what scripts have already been run on the database.
/database/scripts/compiled/: All individual sql files are compiled into a single script and supplied in this directory. For sake of convenience, if you ever have to build a new database from scratch, you can use the one script.
When you add a new sql script to the `scripts` directory, you should also include it in this file.
/distribution/: The only directory that serves static files to users over the internet. When building for production, bundle.js files are created through webpack and stored in this directory. When a user navigates to the correct address, these resources are loaded.
/distribution/images/: This directory is for loading static image files. If you are displaying an image from the server to a user without using a distribution network, the images should all be located within this directory.
/documentation/: Contains reference material for using and developing the product.
/node_modules/: When the node command 'node install' is run, third-party dependencies used by Reeve are downloaded from the internet and stored here.
/server/: This directory contains the server specific code that is run on a node js server. The service is initialised via the server.js file. A separate file server.dev.js contains code specific to when the server is running in a development environment.
/server/controller/: The controller supplies and manages the 'routes' used by the server. When a request is sent to a route on the server, a permission check performed by restrictRoutes.js validates the request and passes the action to a function in one of the files in the orchestrator directory.
/server/models/: The sequelize ORM maps to the database through the models directory. Each database mapping is stored in a unique file in this directory and automatically loaded by the server.
/server/orchestrator/: The orchestrator directory is where data manipulation and communication with the database occurs.
/server/services/: Reeve depends on a variety of third-party services. These integrations are stored in separate files in the services directory, and imported via the server.js file located in the root directory.
/server/utilities/: Server specific utility functions. The file restrictRoutes.js handles the security of routes and whether an endpoint is accessible to a user. browserResponseLng.js Loads the accept-language from the request header. This is used for determining the language a response should be returned.
/server/utilities/errors/: Provides a common set of functions for cleanly presenting server errors to the client.
/shared/: The shared directory is used to share code between the client and the server. This is frequently used in translation and validation, where the inputs and outputs on the server are expected to be the same as what is presented on the client. A significant file in this directory is constants.js which provides a central location for static variables, ensuring values are not 'hard-coded' into multiple pages.
/shared/translations/: The translations directory contains code that initializes i18next with the correct translation strings. Inside this directory, the file i18n.js loads translation strings from a group of sub-directories. A number of utility functions are also provided in this file, used for displaying translation strings, changing the language and determining the currently active language.
/shared/translations/countries/: Country names translated into the language of the translation file.
/shared/translations/currencies/: Currencies translated into the language of the translation file.
/shared/translations/languages/: A collection of translation strings to be used with the i18next package. Translations are divided into separate files based on their language.
/shared/translations/links/: Translatable links that point to unique url's written in the language.
/shared/utilities: Common utility functions shared across the client and server. Date and subdomain manipulation, security token handling and array manipulation.
/shared/validation/: A collection of validation objects used by the 'validate.js' package. Validation should be performed on the client and server, and these validation objects should be as complex as required to maintain the integrity of the application.
/tests_integration/: JMeter is a powerful software application designed to load-test and measure the performance of services. This directory contains a basic pre-made file to load-test Reeve. You will need to download and install JMeter separately.
/tests_load/: The javascript test runner 'ava' is heavily used for integration testing in Reeve. This involves testing the communication paths between the endpoints and the front-end to ensure they are all working correctly. All tests should be stored in the tests_integration directory. You can run the tests using the following command -
npm run test
5.0 Getting Started
In this section we will go over the required tools and installation steps for setting-up Reeve so you can start developing!
While the documentation will try to explain things in as simple terms as possible, we expects reasonable knowledge in a number areas.
Experience with Node JS, an understanding of ECMAScript 6, and useful functions including promises
and await/async. Working knowledge of Express and REST API's.
The documentation is written as a guide for installation on Unix systems. You will need to substitute some of the commands for Windows compatibility.
5.1 Node.js & NPM
Reeve is designed to work with Node v8.0.0 and later. If you don't have Node installed on your system, simply download the installer direct from the website. You can also install node using bash, or using a package manager such as homebrew or pkgsrc
curl "https://nodejs.org/dist/latest/node-${VERSION:-$(wget -qO- https://nodejs.org/dist/latest/ | sed -nE 's|.*>node-(.*)\.pkg.*|\1|p')}.pkg" > "$HOME/Downloads/node-latest.pkg" && sudo installer -store -pkg "$HOME/Downloads/node-latest.pkg" -target "/"
For the convenience of ensuring node is running on the latest version, you can also use a Node Version Manager such as nvm or n to maintain your node installation.
Once you have successfully installed node, you should be able to run the following commands without any problems.
							$ node --version
							v8.0.0
							$ npm --version
							6.4.1
If you haven't had any issues so far, node and npm should be working correctly. We can now setup Reeve.
From the directory that you saved/copied Reeve, we want to point our terminal to this directory so that we are working from the root. Usually you would do this as follows.
cd Reeve
Run the following command to download our node dependencies from the javascript package manager npmjs
npm install
Once the installation is complete, a new directory called node_modules should have been created in the root directory. This contains the node dependencies Reeve is reliant on.
We can now move on to setting up our sql and in-memory databases.
5.2 Building the Database
The MySQL development documentation has a very detailed guide on installing MySQL for various platforms. Please read the following article Getting Started with MySQL.
Once you have successfully installed MySQL, you should be able connect to the server using the mysql client through your terminal.
$ mysql -u root -p
If the connection was successful, you should receive a similar welcome message to the one below.
							Welcome to the MySQL monitor. Commands end with ; or \g.
							Your MySQL connection id is 4
							Server version: 5.7.13 MySQL Community Server (GPL)
Run the following command in your terminal to see a list of existing databases.
							mysql> SHOW DATABASES;
							+--------------------+
							| Database |
							+--------------------+
							| information_schema |
							| mysql |
							| performance_schema |
							| sys |
							+--------------------+
We now want to create a new database which will be used by Reeve.
							mysql> CREATE DATABASE reeve;
							Query OK, 1 row affected (0.01 sec)
As we will be importing scripts to build our database, we will have a significantly less painful experience using a graphical user interface over the terminal.
Most of the database management during the development of Reeve was handled by a mac program called Sequel Pro. An alternative software product for windows is HeidiSQL. If you installed MySQL through an installer, it is also quite possible you may have already installed MySQL Workbench on your machine.
Inside the directory database > scripts > compiled there is a single file called compiled.sql. We need to take the entire contents of this file and execute the contained scripts on our sql database.
The database directory also contains each individual script in chronological order since when they were last created. In the future, as new database changes are made, you don't want to have to rebuild the database from scratch, you only have to run the latest scripts that are yet to be installed.
Once our database is successfully built, we can now point Reeve to our database.
From the Reeve root directory, open the file called config.env. This file contains all the environmental variables used by the server. Populate the following section of the file with the details of the MySQL server you just created -
							# MySQL Database
							DB_HOST=localhost
							DB_USER=root
							DB_PASS=root
							DB_SCHEMA=reeve
							DB_POOL_MIN=0
							DB_POOL_MAX=10
							DB_POOL_ACQUIRE=30000
							DB_POOL_IDLE=10000
Reeve should now be successfully interfacing with our MySQL database. We can now move on to setting up a Redis in-memory database to handle session management.
5.3 Running Redis
Redis is an in-memory database used by Reeve to store active user sessions. A user session is semi-permanent information that is required throughout a user interacting with Reeve, from login to logout. On logout this information is cleared.
To install Redis, read the following official quick-start guide.
Alternatively, if you are using a unix machine, one of the easiest ways to install Redis is using Homebrew (Mac OS) or Linuxbrew (Linux), with the command -
$ brew install redis
To start the Redis server you need to execute the redis-server binary as follows -
$ redis-server
Once these commands have been run, we now need to confirm if the redis-server is working correctly. Run the following command on the redis-cli. You should receive a 'PONG' response.
							$ redis-cli ping
							PONG
The final installation procedure involves mapping Reeve to Redis so the two systems can communicate with each other. In the Reeve root directory, open the file config.env and replace the following lines with the Redis database details.
							# Redis Session Store
							R_HOST=127.0.0.1
							R_PORT=6379
							R_PROXY=false
							R_SECRET=redis_secret
							R_SAVE_UNINITIALIZED=false
							R_RESAVE=false
By default, the Redis host is 127.0.0.1 and the port is 6379.
5.4 Developing Locally
Reeve was developed using the flexible code editing software Visual Studio Code. VS Code is optimized for building web applications and includes a variety of useful integrations that make the development experience easier.
If you do decided to work with VS Code, we recommend a number of plugins to make your experience more enjoyable.
ESLint: JavaScript linting tool for identifying and reporting on code patterns, to maintain code quality.
Prettier - Code Formatter: Code formatting for Prettier.
Sass: Syntax highlighting and auto-complete for Sass files.
Auto-Open Markdown Preview: Displays a visual preview of markdown (.md) files as changes are made.
DotENV: Adds dotenv file syntax support.
When these plugins are installed they should automatically integrate nicely using the configuration files in the Reeve directory.
For complete parity between your development environment and the authors of this product, our user settings file for VS Code has been provided below.
							{
								"telemetry.enableCrashReporter": false,
								"telemetry.enableTelemetry": false,
								"workbench.sideBar.location": "left",
								"editor.insertSpaces": true,
								"editor.minimap.enabled": false,
								"editor.minimap.renderCharacters": false,
								"workbench.iconTheme": "vs-minimal",
								"extensions.ignoreRecommendations": false,
								"html.format.wrapLineLength": 400,
								"gitlens.advanced.messages": {
									 "suppressCommitHasNoPreviousCommitWarning": false,
									 "suppressCommitNotFoundWarning": false,
									 "suppressFileNotUnderSourceControlWarning": false,
									 "suppressGitVersionWarning": false,
									 "suppressLineUncommittedWarning": false,
									 "suppressNoRepositoryWarning": false,
									 "suppressResultsExplorerNotice": false,
									 "suppressShowKeyBindingsNotice": true,
									 "suppressUpdateNotice": true,
									 "suppressWelcomeNotice": true
								},
								"workbench.startupEditor": "newUntitledFile",
								"gitlens.keymap": "none",
								"gitlens.gitExplorer.files.layout": "auto",
								"gitlens.historyExplorer.enabled": true,
								"javascript.updateImportsOnFileMove.enabled": "never",
								"workbench.colorTheme": "Tomorrow Night Blue",
								"editor.formatOnPaste": true,
								"editor.formatOnSave": true,
								"html.autoClosingTags": false
							}
Independent of this product, you can work with any code editor to develop your application. Reeve is not exclusively dependent on this one editor.
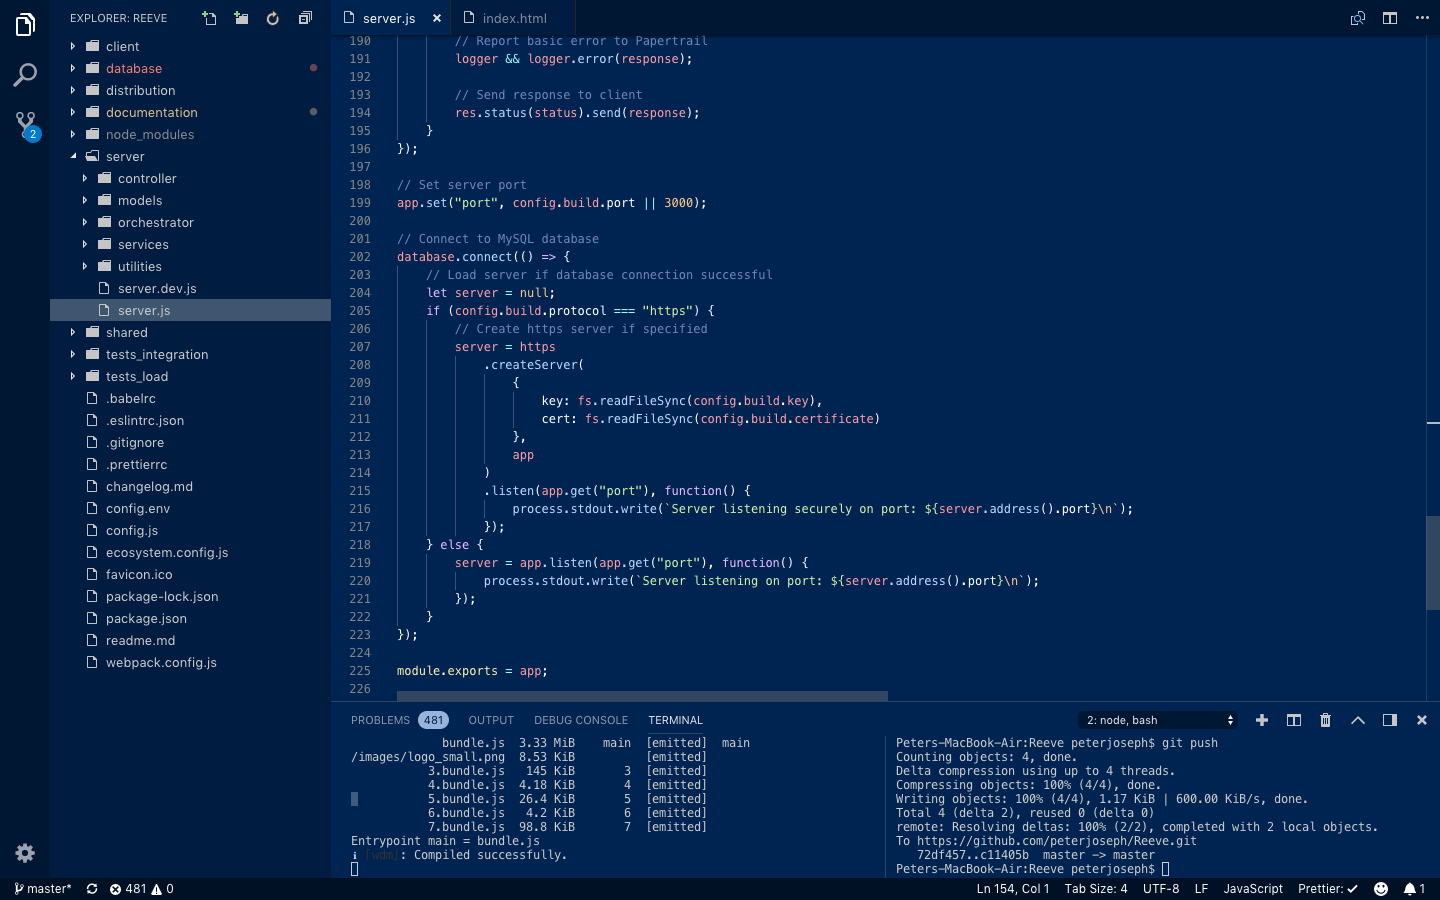
Once your development environment has been set up, the MySQL database and Redis in-memory database are both connected through the config.env file; we can now test the Reeve server on our local machine. Run the following command to start the server in development mode.
$ npm start
If the development server builds correctly, you should receive a response in your terminal similar to the following.
							[nodemon] starting `node ./server/server.js`
							Server listening on port: 3000
							Time: 12336ms
							Asset Size Chunks Chunk Names
								2.bundle.js 5.77 KiB 2 [emitted]
								/images/avatar.svg 6.81 KiB [emitted]
								0.bundle.js 53.3 KiB 0 [emitted]
								1.bundle.js 4.7 KiB 1 [emitted]
								bundle.js 3.33 MiB main [emitted] main
								/images/logo_dark.svg 8.53 KiB [emitted]
								3.bundle.js 145 KiB 3 [emitted]
								4.bundle.js 4.18 KiB 4 [emitted]
								5.bundle.js 26.4 KiB 5 [emitted]
								6.bundle.js 4.2 KiB 6 [emitted]
								7.bundle.js 98.8 KiB 7 [emitted]
							Entrypoint main = bundle.js
							ℹ 「wdm」: Compiled successfully.
Go to the address http://localhost:3000/ in your web browser to see Reeve successfully loaded on the page.
When you make changes to the code-base while the server is running, the server will automatically restart and reload the contents. You may need to occasionally reload your web-browser to see the changes occur.
5.5 Build Tools
Throughout stages of the development lifecycle, it is important that a development environment responds to each stage with unique behaviour that is relevant to the current stage. When in development, you wouldn't expect the server environment to behave the same as it would in production, you probably want access to extra utilities and tools for debugging and testing.
There are three system environments used by Reeve you may be familiar with. Development, Production and Test. All three environments change a number of settings, and should be used as intended. You wouldn't run a development environment on a production server!.
You can change the environment setting in the config.env file in the root directory.
Reeve utilises Webpack, a module bundler that takes javascript files and compiles them into static assets to be loaded by the browser.
Webpack handles a lot of the code change and settings manipulation when swapping between these environments.
In the root directory, open the file webpack.config.js.
Scroll through the code and look for lines such as the following.
config.build.environment === "development"
These checks run code specific to certain environments. In the first function called loadPlugins() there are two stand-out plugins that are loaded on different conditions.
							if (config.build.environment === "development") {
								 plugins.push(new webpack.HotModuleReplacementPlugin());
							}
When in development mode, Webpack loads the HotModuleReplacementPlugin. This plugin provides live page-refresh when code changes occur during development. Plugins such as this, you wouldn't expect to be loaded on production.
							if (config.development.analyzeBundle === true) {
								 plugins.push(new BundleAnalyzerPlugin());
							}
Inside config.env there is an option to enable analyzeBundle (by default this is false). BundleAnalyzerPlugin is a plugin that performs an analysis of the packages in the bundle.js file and reports on their sizes. This plugin is useful if you are concerned about the size of the client application to be downloaded by the web-browser.
If you swap the environmental variable to production, webpack minifies the bundle.js file it is producing, strips out comments and debugging related markers, and creates re-distributable bundle.js files in the ./distribution directory. This setting is for ensuring that Reeve is in a state where it can securely work in production.
React and Redux Developer Tools
When working with the front-end, there are two useful plugins you may be interested in installing on your machine.
React Developer Tools: Adds React debugging tools to the Chrome Developer Tools.
Redux Developer Tools: Adds Chrome developer tools for debugging redux application state changes.
Both of these tools only work when the development environment mode is set.
5.6 Server Configuration
For security reasons, it is never a good idea to "hard-code" private information directly into a code-base. We use environmental variables to pass universal information throughout.
Within Reeve, at the root directory there is a file called config.env. This file contains a large list of environmental variables for configuring, enabling and disabling features on the platform.
In the same root directory, the file config.js takes all of the environment variables from config.env and loads them into a static javascript object that can be imported and used across the server.
You will need to work through the config.env file and determine what properties need to be updated to reflect the desired server configuration.
6.0 The Client
Within web-application phraseology, a client is a forward facing application that is visible to the end-user and provides the graphical interface that the user interacts with to communicate with the back-end server.
Thanks to improvements in javascript, web browser engines, and the development of powerful frameworks such as React.js, we can now develop complex web-applications that are functionally similar to their desktop counterparts.
6.1 Overview
When Reeve is deployed to production, a series of bundle files are generated by the webpack application bundler and stored in an accessible repository from the server. These bundle files contain minified javascript code that are effectively loaded into the web browser and contain the client application the user interacts with to communicate with the back-end server. This follows the client-server relationship model.
While the whole application is written in javascript, the visual front-end of the client application has been developed using react.js, a library for building user interfaces.
Please ensure you have working knowledge of how to use React by reading the following documentation.
Inside the ‘client’ directory, react.js is loaded within the index.js file as follows.
							ReactDOM.render(
								 <Provider store={store}>
								 <I18nextProvider i18n={i18next}>
									  <Fragment>
										   <Notifications />
										   <App />
										   <ReactTooltip />
									  </Fragment>
								 </I18nextProvider>
							</Provider>,
							document.getElementById("app"))
Not only does the index file load the ReactDOM, it also initializes a number of key components the client is dependent upon. The first is Provider store={store}; which is the redux store for handling the application state. The component I18nextProvider supplies language translation of strings across the entire application.
From within the app.js file, during the ‘componentDidMount’ stage, a function called ‘this.browserVersionCheck()’ is executed. If the user has loaded Reeve into an old or incompatible web-browser, a permanent alert at the top of the screen will be visible recommending them to upgrade their web browser as soon as possible.
Once the browser validation is complete, Reeve checks the web-browser local or session storage for a json web token and attempts to authenticate with the server. Regardless of the outcome, once this process is complete and the app knows the login state, React finally renders the page. A react-router component is called which handles what page content to display and whether the user has the necessary security permissions to view the page.
6.2 Routing
The front-end of the Reeve application uses a unique routing system that ensures only certain pages are accessible to users based on the correct security permissions, roles, features and subscription type they may have as a user or client.
This routing is handled within a file called router.js in the ./client directory.
Within this file, pages are loaded asyncronously by calling a component called AsyncComponent.
const overview = AsyncComponent(() => import("./modules/overview"));
Every page component is wrapped in a component called ProtectedRoute.
							<ProtectedRoute
							exact path="/billing"
							role={[ROLE_TYPE.OWNER, ROLE_TYPE.FINANCE]}
							feature={[FEATURES.BILLING]}
							subscription={[SUBSCRIPTION_TYPE.TRIAL, SUBSCRIPTION_TYPE.BASIC]}
							user={user}
							render={()=> (
								 <DefaultLayout key="/billing">
									  <Billing />
								 </DefaultLayout>
							)}/>
By defining certain parameters within this ProtectedRoute, we can restrict the accessibility of the page to a variety of conditions being met.
path: The path the page will be accessible from when navigated to in a web browser.
role: Pages can be restricted on the basis of the type of roles associated with a users account.
feature: Features can be used to restrict functionality to certain paying customers. With an array of features, you can restrict a page to clients who only have certain features on their account.
subscription: An array defining the subscription levels required to access the page. In this example, a user with either a trial or basic account will be able to see the page.
render: When satisfactory conditions are met, render contains the components to be displayed on the page. In this example, a component called DefaultLayout wraps an asyncronously loaded Billing page component. DefaultLayout is a basic component that displays a navigation header on the page.
6.3 Redirects
At times when you are developing the routing for your application, you may experience pages redirecting; whereby you visit one page and the application automatically navigates to another page. It is important to understand why this is happening to prevent frustration when building your application routes.
Inside of ProtectedRoute there are a number of validation checks that need to be satisfied in order for the page to be correctly displayed.
							// Redirect to signin page when on homepage and not logged in
							if (path === "/" && !userLoggedIn) {
								 return <Redirect to="/signin" />;
							}
When a visitor navigates to the homepage of the application, this first validation statement checks if the user is logged in, and if not, redirects them to the sign-in page. If you would like to display alternative pages when a user is not logged in to an account, you can safely delete this code-block.
							// Redirect to billing pages if user is loaded but trial has ended
							if (path !== "/billing" && userLoggedIn && !user.get("subscriptionActive")) {
								 return <Redirect to="/billing" />;
							}
If a user is logged in but their trial or subscription has ended, we don't want them to be able to continue using the application. This validation redirects the user to the billing page when their subscription ends.
							// Show certain routes if user is not logged in
							if ((path == "/register" || path == "/forgot" || path == "/signin" || path == "/signin/help" || path == "/reset") && !userLoggedIn) {
								 return <Route {...this.props} />;
							}
When a visitor is not logged in to an account, there are only certain page routes that the visitor should be able to access. This validation check restricts access to signin, registration and forgot password pages.
							// Redirect if user is loaded
							if ((path == "/register" || path == "/forgot" || path == "/signin" || path == "/signin/help" || path == "/reset") && userLoggedIn) {
								 return <Redirect to="/" />;
							}
Similar to the check above, this one redirects a user back to the homepage if they are already logged in but try to navigate to a signup or registration page. Signup / registration / forgot password should only be accessible when a user is not logged in.
You will need to meet these conditions in order to ensure that your page displays correctly. Alternatively, you can modify the parameters to display your pages outside of these conditions.
6.4 Missing Paths
When a user attempts to navigate in their web browser to a page route that does not exist, we need a way to catch this behaviour and display a generic 'Page Not Found' message.
At the end of the Router.js page, a final ProtectedRoute with a wildcard path of "*" is supplied. If a user navigates to a page that does not exist on the router list, the final MissingPath component will be displayed
							<ProtectedRoute
								 path="*"
								 render={()=> (
									  <DefaultLayout key="*">
										   <MissingPath />
									  </DefaultLayout>
								 )}
							/>
By default, the MissingPath component will display an alternative message when a client subscription has expired compared to when the account is active.
If you are building sub-routes (i.e. /billing/payments/) you should remember to include a MissingPath component with a wildcard path to accomodate the cases where a user enters a partially incorrect page route.
6.5 API Development
When you are developing the front-end client, at times you are going to want to be able to communicate with the server to transfer information between the two. Whether you are retrieving information, or manipulating data, this section focuses on communicating with the server via an Application Programming Interface (API).
An API is a specification of the possible interactions between one component and another. The client / web-browser doesn't necessarily need to know how to perform a complex piece of work, it only needs to know the correct path on the server to call, and the server will do most of the work.
In non-technical terms, if you were at a restaraunt and ordered food from a menu, you wouldn't need to know how the food was prepared, only that you received the meal at the end.
Reeve interacts with the server using REST (Representational State Transfer) APIs and an inbuilt web-browser technology called 'fetch'. A very good introduction to REST APIs can be found at Smashing Magazine.
Sending and requesting data through the REST API is formatted using JSON (JavaScript Object Notation). JSON is formatted like the following:
							{
							 "key1": "value1",
							 "key2": "value2",
							 "key3": "value3"
							}
In the ./client directory there is a directory called ./api. We define all of the APIs we want to communicate with on the server as exportable functions in this location. Open the file authentication.js and review the different functions calling the api on the server. The anatomy of a front-end API call looks like the following.
							// Reset User Password
							export function resetPassword(reset) {
								 return fetch.perform("/api/v1.0/reset_password/", {
									  method: "POST",
									  body: JSON.stringify({
										   password: reset.password,
										   verifyPassword: reset.verifyPassword,
										   code: reset.code,
										   workspaceURL: reset.workspaceURL
									  })
								 });
							}
- The first line is a comment that defines what the purpose of the API call is. In this instance, we have a function that calls an API endpoint to reset a users password.
- The third line calls a unique function called 'fetch' (located in ./client/common/fetch.js). This function receives the path of the api endpoint to communicated with. The location on the back-end server.
- Line four is the method type. In this example, we are making a 'POST' request. The server expects some information from our web-browser for the command to be successful. Other types of request methods can include GET, PUT, PATCH, DELETE.
- The fifth and preceeding lines contains a JSON object with information that we are sending to the server for processing.
Now with this information we can successfully start writing methods that make API calls to the back-end server. Most of the functionality is handled by the 'fetch' function. It is important to understand what this function is doing, as you may need to modify it in the future.
Open the file fetch.js from the following location ./client/common/fetch.js
Fetch is an asyncronous function that is executed every time a method request is made. The purpose of this function is to introduce standardization; i.e if you make changes, you only have to update one function instead of multiple.
Some important functions within fetch.js include -
							// Add security token to header
							if (this.token != null) {
								 options.headers = Object.assign(options.headers, {
								 Authorization: `jwt ${this.token}`
							});
							}
When a user has logged in to an account, every request is attached with a JSON Web Token to ensure that the request is authorized.
							// Handle server side redirects
							if (response.redirected) {
								 return window.location.replace(response.url);
							}
If the server responds with a redirect request, the web-browser will redirect the user to a new page. This is frequently used when a trial account has expired, and we want to direct the user to the billing page.
							// Valid response if status 200 ~ 299
							let json = response.json();
							if (response.status >= 200 && response.status < 300) {
								 return json;
							}

							// Throw error if any other response from server
							return json.then(error=> {
								 throw error;
							});
Once we receive a request, we need to confirm that it was successful and the server is not sending us an error. On every request we check that the server response status is between 200 and 299. If this is true, the function will return the JSON data as normal, if not, the function will throw an error.
While we have built functions that call our REST endpoints, we need to be able to manipulate and store this information as the function itself isn't very useful alone. 6.7 State Management covers retrieving data via our endpoints and storing/manipulating this data.
6.6 Validation
One of the major issues with communicating with API endpoints is security. Because we are sending information back and forth between the client and server, we need to protect the integrity and security of our server.
As users are able to send commands to the server, it is always possible that some are malicious and attempts at retrieving secured information or accessing the database.
To protect against this, we always need to validate the data on both the client and server.
Reeve makes use of a package called validate.js to handle basic integrity checking of the data being sent back and forth.
Common uses of this package might be making sure that when an email field is required, the user sends a string that contains a valid email address. Fields are not empty or the wrong length. A number field contains a number and not an alphanumeric string.
We want to catch all of this as early as possible, and preferably on the client side first.
To start validating javascript objects, we need to import validate from the shared directory.
import validate from "shared/validation/validate";
To use the function, we want to call validate as follows.
							// Validate input parameters
							const valid = validate(objectToBeValidated, ValidationProperties());

							if (valid != null) {
								 // there is a validation error
								 // valid will return an object with the invalid parameters
							});
We pass two parameters into the validate function. The first one 'objectToBeValidated' is a JSON object containing all of the parameters we want to confirm are valid.
The second parameter ValidationProperties() is a function (which returns an object) that contains all of the rules 'objectToBeValidated' will need to conform against in order to be valid.
Validation rules are stored in the ./shared/validation/ directory.
This is what a set of validation rules looks like.
							const workspaceURL = () => {
								 return {
									  workspaceURL: {
										   presence: {
											    allowEmpty: false
										   },
										   format: {
											    pattern: "[a-z0-9]+",
											    flags: "i",
											    message: t("validation.validators.validCharactersAZ09")
										   },
										   exclusion: {
											    within: RESTRICTED_DOMAINS,
											    message: t("validation.validators.validWorkspaceURL")
										   },
										   length: {
											    minimum: 4,
											    maximum: 255
										   }
									  }
								 };
							};
We recommend reading the documentation on the validate.js website and following their best practices when designing your validation rules.
6.7 State Management
As a user navigates through an application, we would expect that the pages change and provide relevant contextual information to the user as they interact with it.
As these applications grow and involve lots of moving pieces, managing all of these changing components becomes increasingly complex.
To handle state management and the frequent data manipulation in large applications, we rely on a package called Redux.
"Redux is a predictable state container for JavaScript apps."
The following article is a very good introduction to Redux, how it works and how to use it.
The Redux store (explained in the proceeding section) is located in the following directory ./client/common/store/. A group of imports and helper functions are used on each of the pages to call functions that manipulate this redux state container.
To see this in action, open the file authentication.js located at ./client/common/store/reducers/authentication.js
							export default function authentication(state = DEFAULT_STATE, action) {
							switch (action.type) {
								 case LOGIN_PENDING:
									  return state.setIn(["userLogin", "status"], REDUX_STATE.PENDING);
								 case LOGIN_FULFILLED:
									  return state.set(
										   "userLogin",
										   fromJS({
											    status: REDUX_STATE.FULFILLED,
											    payload: action.payload
										   })
								 );
We first define a series of 'states' we expect our application to be in at certain times. In the example above, a userLogin state, we would expect to be 'pending' and 'fulfilled' once a user has logged in.
Next we create functions that call these actions to manipulate the state.
							export function loginUser(body) {
								 return dispatch => {
									  dispatch({
										   type: LOGIN_PENDING
									  });
									  return userLogin(body).then(
										   result => {
											    return dispatch({
												     type: LOGIN_FULFILLED,
												     payload: result
											    });
										   },
										   error =>
											    dispatch({
												     type: LOGIN_REJECTED,
												     payload: error
											    })
									  );
								 };
							}
Do you notice anything interesting about the example above?
The following function manipulating the Redux store calls the function userLogin(). This function is one of the api functions located in our ./client/api/ directory.
So the process is as follows. We are calling an action function called a Reducer. This Reducer sets the state to 'Pending'. While the state is 'Pending,' the action function calls another function in our ./api directory. If this communication with the server is successful, we change the state to a 'fulfilled' state.
Open the file SignIn.js located in ./client/modules/authentication/SignIn.js
At the base of the file we are using two functions to integrate with our Redux store. mapStateToProps and mapDispatchToProps.
							function mapStateToProps(state) {
								 return {
									  workspaceURLStatus: state.getIn([AUTHENTICATION, "workspaceURL", "status"]),
									  logInStatus: state.getIn([AUTHENTICATION, "userLogin", "status"]),
									  clientStyle: state.getIn([AUTHENTICATION, "workspaceURL", "payload"]),
									  userToken: state.getIn([AUTHENTICATION, "userLogin", "status", "payload", "token"]),
									  userKeepSignedIn: state.getIn([AUTHENTICATION, "userLogin", "status", "payload", "keepSignedIn"])
								 };
							}
In the mapStateToProps function, we are pulling data from our redux store and loading it into the SignIn component so that is accessible to the user on the front-end.
If we want to manipulate this data, we use the mapDispatchToProps function and call one of the Reducers (Action functions) which goes and calls an API and then manipulates the Redux store.
							function mapDispatchToProps(dispatch) {
								 return {
									  loginUser: bindActionCreators(loginUser, dispatch),
									  loadUser: bindActionCreators(loadUser, dispatch),
									  validateWorkspaceURL: bindActionCreators(validateWorkspaceURL, dispatch),
									  changeLanguage: bindActionCreators(changeLanguage, dispatch)
								 };
							}
This is a basic introduction to how Reeve uses Redux to maintain its application state and where they key files are located. To gain a full understanding of working with Redux, it is important to read the official documentation.
6.8 The User Store
A Redux store, is a central location that maintains the state of an application. The only way to manipulate the application state is to 'dispatch' an action on it.
The following page explains the store and the type of functions that can be called against it.
As you would have seen above, we defined our store and the action functions in the directory ./client/common/store/. We then made sure our Redux store and action functions were accessible to our pages using mapStateToProps and mapDispatchToProps.
In Reeve (and part of Redux) we also have a 'User Store.' This is a central location where we keep all of the personal information relevant to a logged in user.
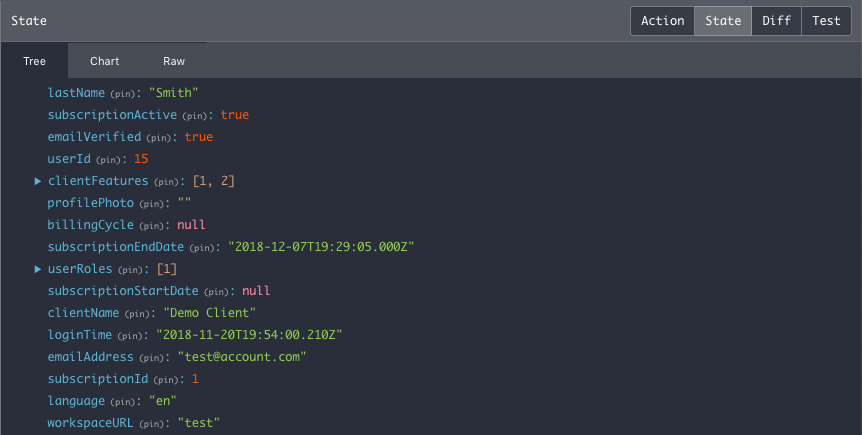
The reason we lump all of this together, is we want the application to have easy access to the features, subscription type, and roles a user might have, so that we display the correct information, and restrict the parts of the application we don't want the user to see.
You can access the user store very easily by importing the following component.
import User from "common/components/User";
And passing it into the React propTypes.
							component.propTypes = {
							 user: PropTypes.object
							};
The user component is very heavily used in displaying and hiding content, and restricting access to certain pages. You will find further references to this component throughout the documentation.
6.9 Common Components
Reeve provides a variety of common components to integrate into your application.
The goal is to provide a set of standardized components to reduce development time, and maintain consistency in the project.
For example, if you have a form field, you can use the same field component to support every element. This reduces duplication, and the risk in discrepancies amongst changes in different areas.
For ease of access, all shared React components should be stored in the same directory. ./client/common/components/
Many of the components are explained in significant detail throughout the documentation.
6.10 Asynchronous Components
Once the code is ready for production and the environment variables have been set, Reeve takes the client side code and creates bundle files. Bundle files are served to the web-browser when a user visits the application website.
As there is a lot of code required to build a useful front-end application, we don't want a user to have to download everything at once just to access it. They should not be waiting 30 seconds to download a 4mb bundle file.
To address this, we use asynchronous components. Instead of loading everything on start, the web browser only downloads the code required to work the current page. As the user navigates through the application, more content is downloaded asynchronously. Instead of a single bundle file, the application is broken down into multiple smaller bundle files, downloaded when required.
To prepare our codebase when developing, we need to make sure that our pages are loaded asynchronously, so that when the bundles are generated, webpack knows to split them into separate bundle files.
Import a component called AsyncComponent as follows.
import AsyncComponent from "./AsyncComponent";
You can now import your pages or components like this.
							const MissingPath = AsyncComponent(() => import("./MissingPath"));

							<MissingPath />
6.11 Input Components
One of the advantages of using React is that components are reusable. Not only does this reduce code duplication, it also means that you can make changes to one component, and the changes are reflected across the whole app.
Reeve provides a number of standardized input elements you can integrate into your application.
| Component | Inputs |
|---|---|
<InputField />
|
|
<Checkbox />
|
|
<WorkspaceURLField />
|
|
6.12 Page Layouts
Inside ./client/common/ there is a directory called layouts.
The purpose of this directory is to act as a central location for layout components. Layout components wrap around page components and provide common elements such as Headers, Sidebars and Footers.
This is a better alternative than hard-coding these elements into every page, especially when they may not be needed.
To use a page layout component, we inject it into the render stage of the React Router in ./client/Router.js
							import DefaultLayout from "common/layouts/DefaultLayout";

							<ProtectedRoute
								 exact
								 path="/settings"
								 role={[ROLE_TYPE.OWNER, ROLE_TYPE.ADMINISTRATOR]}
								 user={user}
								 render={() => (
									  <DefaultLayout key="/settings">
										   <Settings />
									  </DefaultLayout>
								 )}
							/>
Because layout components contain elements that are frequently changing (i.e. Header navigation), a 'key' must be specified. This forces React to refresh the layout on every page change so that the correct display is always visible.
6.13 Global Styling
Reeve has inbuilt support for Bootstrap 4, which is used in a number of locations throughout the application.
Bootstrap is a front-end framework for building responsive websites. They supply a collection of HTML, CSS, and Javascript templates that make it easy to create page layouts and style pages.
An introduction to using Bootstrap can be found here.
Inside the directory ./client/common/styles/ there are a set of .scss files that include styling customization both dependent and independent of the bootstrap defaults. The file _bootstrap_variations.scss adjusts some of the default bootstrap colours used by the framework.
When you create styling sheets, store them in this directory.
To offer the most styling flexibility, it may be valuable to integrate a way for users to customise the colours and styling of the application theme.
Reeve provides a component called GlobalStyling that overrides the default theme colours to those specified by the user. If you would like to create an element that the colour can be adjusted by the user, you will need to update this file.
							loadPCS(color) {
								 return `
									  a {
										   color: ${color};
									  }

									  .btn-primary {
										   background-color: ${color};
										   border-color: ${color};
									  }
							...
In the database there is a table called clientStyling where each row represents a primary, secondary color, background image and background color for a particular client. When a user is loaded, these values are checked in the database and then passed to GlobalStyling to overide the default colours.
GlobalStyling takes the primary and secondary colours from the database and overrides the default colour values supplied by the framework.
6.14 Notifications
This feature is part of an upcoming release. Documentation will be supplied closer to the release date.
6.15 Alerts
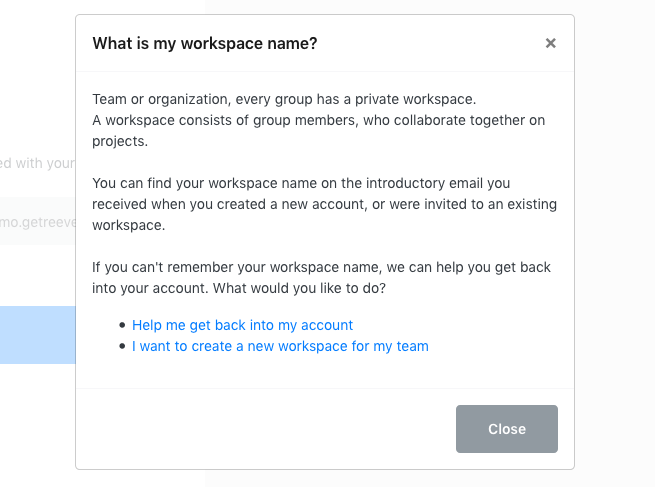
An alert is a modal component that appears over the screen and overlays the content behind it with a faded background.
This type of component is useful if you want to draw a users attention to something, or there is an event you require immediate action.
It is very easy to display an alert overlay. In the render() component of a page, import and return the component within an if statement.
							import Alert from "common/components/Alert";

							if (visible) {
								 return (
									  <Alert title={} closeModal={}>
										   {message}
									  </Alert>
								 );
							}
Alert supports the following configuration properties.
title: The title message to be displayed in the alert header.
children: A react propType. Wrap any object around the component (as above) and the content will render within the modal.
closeModal: A function to be called when the close button, or background shade is clicked.
6.16 Success & Error Messages
In a number of situations it may be valuable to display a success or error notification. When a user saves a field and the update is completed successfully, you can notify the user of the success.
Alternatively, if an update or action results in an error response from the server, you may want to present this information in a clean and appropriate way. Reeve provides a couple of different success and error styles.
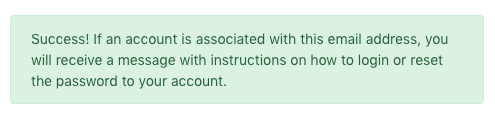
Success Notification

A success notification appears at the very top of the page above the header. To render a success notification, import the component and render it toward the top of a page.
							import SuccessNotification from "common/components/SuccessNotification";

							{showSuccessMsg && <SuccessNotification path={{ reset: "success" }} message={t("success.resetPassword")} />}
In the instance above, when a user navigates to a url with the parameter ?reset="success", the success notification will display when the url parameter and showSuccessMsg variable conditions are met. The message with translation string "success.resetPassword" will be rendered in the notification.
Server Success Message
A ServerSuccess message is a smaller notification usually displayed above forms or simple input fields. This type of notification is used in a very similar fashion to the SuccessNotification type.
Import the code as follows.
								import ServerSuccess from "common/components/ServerSuccess";

								{showSuccessMsg && <ServerSuccess path={{ registration: "success" }} message={t("success.clientRegistration")} />}
In this example, the message will display when the web-browser url correctly displays the ?registration="success" query and the showSuccessMsg variable condition has also been met.
Server Failure Message

The final example is very similar to the ServerSuccess type except the ServerFailure component displays a red coloured warning message.
							import ServerError from "common/components/ServerError";

							return <ServerError error={serverError} />
ServerFailure does not require a query string match in the web-browser to display. Simply render the component and pass the server message directly in as an "error" prop.
6.17 Interface Icons
Icons are a valuable way to make an interface recognizable. They add common, memorable, symbolic value, and are used to communicate. They improve usability, and strengthen navigation as people perceive images faster than words of text.
The value is clear, and designing an application with the inclusion of icons makes a great interactive experience.
For organizational purposes, all of the icons used by the front-end in Reeve should be stored within the directory ./client/common/media/icons/.
Inside this directory, every icon is represented as a Javascript file for easy importing across the application. The exportable function inside the file returns an svg image containing a 'Glyph' icon.
For example:
							return (
								 <svg {...props} fill="none" stroke="currentColor" strokeLinecap="round" strokeLinejoin="round" strokeWidth="2" viewBox="0 0 24 24" xmlns="http://www.w3.org/2000/svg">
									  <rect x="3" y="3" width="18" height="18" rx="2" ry="2" />
									  <line x1="3" x2="21" y1="9" y2="9" />
									  <line x1="9" x2="9" y1="21" y2="9" />
								 </svg>
							);
The svg has been minified to clean and remove unimportant information, and reduce the overall filesize. You should always use a tool such as SVGMinify to clean your svg files before you import them into your project.
7.0 The Server
Following the client-server model, a server is a computer that processess requests and delivers data over a network.
Our client, the Reeve application front-end is loaded into the web-browser, and communicates with the server using RESTful API calls.
Our web-application server is written in Node.js and the Express middleware framework, and typically sits on-top of a Platform as a Service (PaaS), offered by AWS, Azure, Digital Ocean or Heroku.
7.1 Overview
Reeve is a web application boilerplate that runs on Node.js, a JavaScript runtime environment. This runtime allows developers to write code that executes inside a computer process, and therefore, operate on a server.
The Node run-time environment is built on the V8 JavaScript Engine, which is the same engine found in the popular web-browser Google Chrome.
You may be asking "Why Node.JS?" and not other popular servers like Apache Tomcat?
Javascript as a language is increasingly growing in popularity, and has been used in the web-browser since the 90s. By taking a web-browser based language and applying it to the server-side, we remove the need to distinguish between the two different environments. You can write in the same programming language for both the client and the server.
The V8 engine is incredibly fast, and the single thread node event loop performs input/output operations asynchronously, which are non-blocking. This means that the applications you build are fast, take up less memory, and can handle alot of simultaneous connections at once.
One layer above the Node.js environment sits Express.
Express.js is a web-application framework, and the most popular framework for Node.js. Express simplifies development and makes it significantly easier to build web applications, as it introduces simple routing, sessions and middleware handling.
These two services provide the "backbone" of the Reeve server-side application.
7.2 Node.js Environments
When Reeve is started, it looks for the value of an environment variable called NODE_ENV. Depending on this value, the application can behave in unique ways. For example, in a development environment, there is extra debugging and logging tools enabled.
There are 3 major environments Reeve recognizes, and are frequently supported by many cloud application hosting providers.
development: In development mode, webpack automatically builds the bundle files. Extra logging and error reporting is also enabled. Code is decompressed for better reading. Access to React and Redux development tools are enabled.
production: In production mode, on start, Reeve expects bundle files to already exist, and simply starts the server to communicate via the api endpoint and serve the bundle files. You will need to build the bundle files first by running the command 'npm run build:production'. When the bundle files are built in production, they are compressed, and stripped of unnecessary data. In production, the server disables debugging and error reporting to the front-end.
test: When you run the command 'npm run test' you should also change the environment to 'test'. The test environment loads a basic express server and disables webpack from building bundle files.
You can change the value of the environment variable from the config.env file located in the root directory. By default it is set to Development.
7.3 Services
Reeve integrates with a lot of third-party platforms and products. Our attitude towards Software as a Service (SaaS) products is, there's no point reinventing the wheel. If an existing solution on the market works well, don't try to duplicate it. Use what works, build fast, and ship fast.
Some of the services we integrate with include Stripe, Sentry and PaperTrail.
In the directory ./server/services/ are files that provide the integrations for the third-party services.
These files and their exported functions are called throughout the application. The value of developing a system like this is that you can easily swap out an integration by changing the functions in the file, without having to make changes throughout the whole application.
Initiating these services occurs in ./server/server.js. For example:
							let nodemailer = require("./services/nodemailer");

							// Initialise Email Service
							nodemailer.initialize();
As you increase the integrations used with your application, it is valuable to continue to create an interface in this directory, and call the interface throughout the application, instead of the integration directly.
7.4 Routing
Just like the front-end, the Reeve back-end has its own internal routing system using Express routing.
Inside the directory ./server/services/ the file router.js builds the express routing using all of the files located in the directory ./server/controller/.
Routes are the api endpoints that the front-end calls in order to send and receive data, and interact with the back-end of the web application. These endpoints follow the RESTful API design.
To create new routes, all you have to do is create a file in the above directory, and follow a structured pattern.
								module.exports = function(router) {
									 // Endpoint 1
									 router.get("/api/v1.0/endpoint_one/", restrict({ registered: true, unregistered: true }), function(req, res, next) {
										  return res.status(200);
									 });

									 // Endpoint 2
									 router.get("/api/v1.0/endpoint_two/", restrict({ registered: true, unregistered: true }), function(req, res, next) {
										  return res.status(200);
									 });
								};
Reeve will automatically take all of the files from the orchestrator directory and build the endpoint routing.
In the example above, the front-end could make a request to the address -
HTTP GET https://<server_address>.com/api/v1.0/endpoint_one/
Writing good endpoints should always follow a consistent structure.
When an endpoint is called, the client always expects a response from the server. There are two types of suggested responses you can return. Here are both ways of returning a response for an endpoint.
Response Status and JSON Response Data
return res.status(200).send({result: resultData});
In this example, the endpoint will respond with a server status of 200, and also supply the JSON response data.
Error Response
return next(error);
Used for when a serious exception / error occurs. The error will bubble upwards, and the stack trace will be sent to server logging. Errors sent like this will always result in a 503 server error response being sent to the client.
For details on securing server endpoints, please read the documentation section titled 7.8 Endpoint Security.
7.5 Connecting to the Database
Reeve uses an Object Relational Mapper (ORM) called Sequelize for connection and communication with an external database. An ORM lets you query and manipulate the data in a database using an object-oriented paradigm. Instead of writing scripts in SQL, you can action the database with javascript.
By default, Reeve has been developed to use MySQL. However, as Sequelize also supports Postgres, SQLite, and Tedious; it is possible to strip out the database layer and interface with a different database alternative.
To do so, simple remove mysql2 from package.json and install an alternative:
							$ npm install --save pg pg-hstore
							$ npm install --save mysql2
							$ npm install --save sqlite3
							$ npm install --save tedious // MSSQL
Open the following file ./server/services/sequelize.js and change the following line to your desired database type -
dialect: "mysql",
For more information on configuring Sequelize, please read the following documentation
To create the interface between our database and Reeve, we need to update the connection information in ./config.env. Database configuration settings are simply environmental variables.
							# MySQL Database
							DB_HOST=localhost
							DB_USER=root
							DB_PASS=root
							DB_SCHEMA=reeve
							DB_POOL_MIN=0
							DB_POOL_MAX=10
							DB_POOL_ACQUIRE=30000
							DB_POOL_IDLE=10000
Inside ./server/services/sequelize.js these values are passed to a Sequelize class that is created when Reeve starts.
							// Connect to database through Sequelize
							connection = new Sequelize(config.database.schema, config.database.username, config.database.password, {
								 host: config.database.host,
								 dialect: "mysql",
								 operatorsAliases: false,
								 pool: {
									  max: config.database.max,
									  min: config.database.min,
									  acquire: config.database.acquire,
									  idle: config.database.idle
								 },
								 logging: false
							});
If the connection is successful, you can access the database by importing Sequelize.js and calling the database() function.
							import { database, models } from "services/sequelize";

							return database().transaction(async function(transaction) {});
Review the code in ./server/orchestrator/authentication.js for a good working model of communicating with the database.
7.6 Database Models
Sequelize uses models to represent tables in the database. Every model maps to a column in the table, and you use 'getters' and 'setters' to retrieve and manipulate this information.
In order for Sequelize to recognize a table in the database, the table must have a model defined.
You can find out more about creating model definitions here.
In the directory ./server/models/ are located all of the database model definitions. When the Reeve server starts, it automatically looks through this directory for any files and imports them. You don't have to do this manually.
							// Import models to sequelize from the models directory
							fs.readdirSync(path.join(__dirname, "../models")).forEach(function(file) {
								 if (file.toLowerCase().indexOf(".js")) {
									  var model = connection.import(path.join(__dirname, "../models", file));
									  sqModels[model.name] = model;
								 }
							});
To call the 'getters' and 'setters' in the models, there is a slight variation from how the Sequelize documentation recommends.
Open the file ./server/orchestrator/authentication.js
One of the examples for loading a client from the client table is as follows.
							import { database, models } from "services/sequelize";

							// Load a client using a workspaceURL
							const client = await models().client.findOne({ where: { workspaceURL: workspaceURL, active: true } }, { transaction: transaction });
The first function models() retrieves an object containing all of the database model definitions. The second value 'client' selects the client model from the object. The next function findOne is one of the function calls on the model definition to find a single client with the specified parameters.
The process is largely the same as writing standard Sequelize functions, except that you first import all the model definitions in a function, and then select the model you would like to action against.
A tutorial on model usage can be found here.
7.7 API Design & Development
The Reeve server makes a distinct division between endpoints that a client communicates with, and where the processing and database manipulation occurs.
Controller: ./server/controller/
Orchestrator: ./server/orchestrator/
The controller is where the endpoints are first defined. When the client communicates with the server, any data that is sent or received passes through the controller. It is the responsibility of the controller to ensure that the endpoints are secure, the user is properly authenticated, and that the correct response is returned.
Once the controller has successfully validated the data (and authentication) it has received, it calls the functions in the orchestrator. The orchestrator performs the data manipulation, communicates with the database, and then returns this information back to the controller.
Following this organisational pattern is great for function reusability, and improves code structure.
A typical endpoint uses this structure -
							router.post("/api/v1.0/endpoint_url/", restrict({ unregistered: true, registered: true }), function(req, res, next) {
								 // Store received object properties
								 const body = {
									  requestObject: req.body.requestObject,
								 };

								 // Load browser language from header
								 const browserLng = browserResponseLng(req);

								 // Validate properties in received object
								 const valid = validate(body, validateObject());
								 if (valid != null) {
									  return next({});
								 }

								 // Call function in orchestrator
								 orchestratorFunction(body, browserLng).then(
									  result => {
										   return res.status(200).send(result);
									  },
									  error => {
										   return next(error);
									  }
								 );
							});
In this example, we have a RESTful POST request. The function loads the request body into a body object. It calls a function browserResponseLng that determines the browser language of the request (from the header), validates the properties, and then calls a function in the orchestrator to perform an action, and send a response back to the client.
The endpoints that you write should follow the same consistent structure.
7.8 Endpoint Security
When looking at each of the endpoints in the controller directory, you may have noticed a restrict() function being called after the endpoint url is defined.
router.get("/api/v1.0/endpoint_url/", restrict({ registered: true, unregistered: true }), function(req, res, next) {});
Restrict is a middleware function that should be called on every endpoint. Its sole purpose is to provide authentication and security for the endpoint, and acts as a gateway to allowing only certain users with the right roles and permissions to communicate.
You can define how you want to restrict an endpoint by passing an object into the restrict() function and specifying any of the parameters below.
| Parameter | Type | Description |
|---|---|---|
| registered | Boolean |
When true, a user that is registered and currently logged in can access the endpoint. When false, registered users cannot access the endpoint. |
| unregistered | Boolean |
When true, a user that is unregistered and not currently logged in can access the endpoint. When false, unregistered users cannot access the endpoint. |
| activeSubscription | Boolean |
When true, a user must have an active subscription to access the endpoint. |
| hasAnyRole | Array |
hasAnyRole takes an array of roles defined in both the database and ./shared/constants.js. If a user has any of the defined roles, the criteria to pass this restriction has been met. |
| hasAllFeatures | Array |
hasAllFeatures takes an array of features defined in both the database and ./shared/constants.js. A user/client must have all of the defined features before the criteria to pass this restriction is met. |
It is important to note that all of the defined endpoint restriction criteria must be met in-order for endpoint access to be valid. A user cannot pass one restriction and fail another, and still be allowed to communicate through the endpoint.
7.9 Session Management
In modern cloud architecture, where the goal is to build scalable services, there is a strong emphasis on building "stateless" architectures.
A stateless web architecture depends only on input parameters that are supplied, while a stateful architecture relies on a session state to process requests.
If a stateful architecture has an internal session state, then it becomes impossible to scale the application horizontally, because every time there is an attempt to route a user to a particular server, a previous request session may be located on a different server, so the information is not correctly shared across all machines.
To work around this issue, we externalise the session management to a third-party, then we use stateless machines that pull data session data from the external source in-order to perform an action.
The Reeve server is stateless, this means that you can easily scale horizontally and run multiple servers on different ports at once.
Reeve pulls session data from Redis, a separately managed in-memory database store.
Redis is an in-memory database used by Reeve to store active user sessions. A user session is semi-permanent information that is required throughout a user interacting with Reeve, from login to logout. On logout this information is cleared.
Redis can be configured in the config.env file in the root directory, or as specified in the environmental variables. To edit the service configuration directly, edit the file ./server/services/redis.js
							# Redis Session Store
							R_HOST=127.0.0.1
							R_PORT=6379
							R_PASS=
							R_TTL=604800
							R_PROXY=false
							R_SECRET=redis_secret
							R_SAVE_UNINITIALIZED=false
							R_RESAVE=false
While session management is one aspect that Reeve relies on Redis for, Redis is also used for basic DDoS protection. When a person initiates a request from an endpoint, the IP address of the user is recorded in the in-memory database. If the user attempts to "hit the endpoint" too frequently, they will be temporarily locked out.
7.10 CORS
Because Reeve supports subdomains for each client, and it is possible that a server is located on a different domain to the front-end client, CORS is a very important consideration.
Cross Origin Resource Sharing (CORS) is a standard defined by the w3c foundation on communication between different domains.
For security purposes, it is very important that CORS is properly configured. CORS blocks requests made by unknown domains and keeps the connection open only to the domains in its 'approved list'. It can also restrict access from domains that are unsecured using HTTP instead of HTTPS.
Web browsers typically follow a same-origin policy, which prevents javascript from executing code located at a different domain to the one it was served from. CORS relaxes these policies, allowing Javascript on a web page to access a REST API located at a different domain from the origin.
By default, the CORS configuration is defined in ./server/server.js to support the base domain as well as subdomains.
							cors({
								 origin: new RegExp(config.build.domainPath + "$"),
								 optionsSuccessStatus: 200,
								 methods: "GET,PUT,POST"
							})
You can modify the origin parameter to an array to support more than one domain. Change the methods parameter to adjust the type of requests that are supported by the server.
7.11 Validation
Just as we covered front-end validation in 6.6, the exact same functionality can be used on the back-end.
In every route you should validate the data object received in the request before passing the data on to the orchestrator functions.
							// Validate Object
							const valid = validate({ object1: object1, object2: object2 }, validationModel());

							if (valid != null) {
								 const errorMsg = new ServerResponseError(403, "response message", { lng: browserLng }), valid);
								 return next(errorMsg);
							}
If the response fails, simply pass an error message into the next() function inside the route.
Validation conditions are defined in ./shared/validation/. As validation on the back-end works exactly the same as the front-end, you can comfortably share code between the two.
7.12 Sending Emails
Reeve uses the popular Node.js package Nodemailer. This module makes it easy to integrate email sending into a web application.
The Nodemailer integration is performed in ./server/services/nodemailer.js. To start using the service, you need to specify the value of the environmental variables in the config.env file relating to the mail server that the emails are to be sent from.
							# Email Hosting
							EMAIL_SENDER_ADDRESS=sender@example.com
							EMAIL_HOST=
							EMAIL_PORT=
							EMAIL_SECURE=false
							EMAIL_AUTH_USERNAME=
							EMAIL_AUTH_PASSWORD=
Once you have specified the values to connect to your mail server, you can easily send emails in your application by calling the following functions.
In your orchestrator layer functions, import the sendEmail function from the nodemailer service.
import { sendEmail } from "services/nodemailer";
Create a new object and store the values you would like to pass to the email template.
							// Build email parameters object
							const emailParams = {
								 firstName: "",
								 workspaceName: "",
							};
Emails are written in the popular EJS Framework, which allows a user to write HTML markup with JavaScript. The markup is saved in the database in the 'emailTemplates' table.
By specifying values in the emailParams object, we are storing properties that will be imported into the email template and appear in the final email.
For more information on importing values into templates, please read the following documentation.
You then need to call the sendEmail function and specific the function parameters in the following format.
							// Send welcome email to user example
							sendEmail(
								 EMAIL_TYPE.CLIENT_WELCOME,
								 userInstance.get("language"),
								 userInstance.get("emailAddress"),
								 emailParams,
								 clientInstance.get("id"),
								 userInstance.get("id")
							);
The first function parameter is from the constants file, and is a numerical value of the email type to be sent. The second value is the language the email will be sent in, usually the default language defined by the user. The third parameter is the email address to sent the email too. The fourth, we specify the parameters to be passed to the email template. Parameter 5 and 6 is the clientId and userId respectively.
7.13 Passport Authentication
User account authentication is handled by a Node.js package called Passport. The configuration of the package is found in ./server/services/passport.js
Passport is middleware that supports a mixture of authentication strategies, from basic username and password, to Facebook, Twitter, Oath, and more. By default, Reeve has been built with username and password authentication.
Authentication with passport is very simple. Simply import the passport function, and call authenticate()
							import passport from "services/passport";

							passport.perform().authenticate("jwt", function(error, user) {});
The string "jwt" tells passport that the type of authentication being requested is a "JSON Web Token," username and password based authentication type.
7.14 Security Tokens
Username & Password authentication with Reeve uses JSON Web Tokens.
A JSON Web Token (JWT) is an open, industry standard method of securely transmitting information between two parties as a JSON object. JSON web tokens are digitally signed using a secret key, and are a secure way of ensuring that the person sending the key is the one who signed it.
Once a user has authenticated via the functions in ./server/services/passport.js, they receive a JWT. Subsequent requests with the JWT specified in the request header ensures that they don't have to keep authenticating.
The JWT is passed into the header via the ./client/common/fetch.js file.
							// Add security token to header
							if (this.token != null) {
								 options.headers = Object.assign(options.headers, {
									  Authorization: `jwt ${this.token}`
								 });
							}
As long as you add the restrict() middleware function to each of your routes. The middleware will look for the authentication parameter in the request header, and verify that the token is valid.
The JWT is stored in web browser storage for future use. If the user selects the option to 'Keep logged in,' then the JWT is stored in the browsers LocalStorage. Otherwise, the token is stored in SessionStorage.
All of the functions to save, retrieve, and delete tokens are found in a file called securityToken.js, located in ./shared/utilities/
							// Store security token in browser
							export function saveToken(securityToken, keepSignedIn) {
								 ...
							}

							// Clear security token from browser
							export function clearToken() {
								 ...
							}

							// Retrieve security token from browser
							export function getToken() {
								 ...
							}
As the username and password based authentication has already been built, there isn't too much in this area you should need to change.
Once a user has been authenticated, a session is created and stored in Redis. The session data that is stored in Redis includes the workspaceURL, the clientId, and the userId.
Reeve decrypts the JWT token, and validates that the information stored in the session matches the properties encrypted in the token.
If the two are found to be a match, and the token is valid, the authentication is successful and the request can proceed.
7.15 Stripe Payment Gateway
This feature is part of an upcoming release. Documentation will be supplied closer to the release date.
7.16 Sentry Error Logging
Sentry is a subscription based, error tracking platform that provides realtime deep context analysis.
If something goes wrong with your application and there is an exception, it is always valuable to be able to trace the cause and implement a fix as soon as possible.
Reeve directly integrates with Sentry by default. Simply update the environmental variables with your configuration details.
							# Sentry Error Reporting
							SENTRY_ENABLED=false
							SENTRY_DSN=https://@sentry.io/
7.17 Papertrail Logging
Another subscription service that Reeve integrates with directly is Papertrail.
Papertrail is a hosted log aggregation service.
To interface with Papertrail, you will need to update the following environmental variables with your configuration details.
							# Papertrail Logging
							PAPERTRAIL_ENABLED=false
							PAPERTRAIL_HOST=logs.papertrailapp.com
							PAPERTRAIL_PORT=1111
							PAPERTRAIL_HOSTNAME=host
							PAPERTRAIL_LEVEL=debug
A node package called Winston logs data and passes the logs over to Papertrail. You can change the type of messages and information that are sent by modifying the following block of code in the ./server/server.js file.
							expressWinston.logger({
								 transports: [PTtransport],
								 meta: false,
								 msg: "{{req.ip}} - {{res.statusCode}} - {{req.method}} - {{res.responseTime}}ms - URL: {{req.url}} - ORIGINAL URL: {{req.originalUrl}} - HOST: {{req.headers['host']}} - ORIGIN: {{req.headers['origin']}} - REFERER: {{req.headers['referer']}} - USER AGENT: {{req.headers['user-agent']}}",
								 expressFormat: false,
								 colorize: true,
								 ignoreRoute: function(req, res) {
									  return false;
								 }
							})
7.18 Server Errors
Occasionally due to code or server issues, there may be times when an internal server error occurs. How we handle the response to this error is incredibly important as we don't want to inadvertedly leak any sensitive data to the front-end client, and inevitably, the user.
By default, when a server error occurs, Reeve follows a "default deny" policy. The error is recorded to logging services such as Papertrail, but only a generic 500 response message is returned to the front-end client. This is designed to reduce the risk of returning error information.
							{
								 status: 500,
								 message: "It looks like something has gone wrong on our system. Don't panic! While our engineers investigate, feel free to contact us and provide the following code for further details. Code: XXXXXXXXXXXXXX"
							}
At times, especially when the error is deliberate, you may want to return a custom message and error code to the front-end client.
You can easily do so using the ServerResponseError object.
Import the component from the utilities directory as below.
import { ServerResponseError } from "utilities/errors/serverResponseError";
Then throw the error object like so.
throw new ServerResponseError(403, t("i18n.translationString", { lng: browserLng }), { object1: object1, object2: object2 });
ServerResponseError takes 3 parameters. The first is the error response code. The second is an error response message, and the third is an json object you can pass to the front-end and use accordingly.
As the error handler works its way through resolving the issue, it will recognize the ServerResponseError type, and return this object through to the front-end instead of the generic error response message.
8.0 Shared Components
Traditionally, developers have frequently had to develop client and server applications independently, as they are written in separate languages, and don't understand each other. Communication protocols pass messages between the two, and they work independently to translate the information and work on-it in their own siloed environments.
As Reeve is written in Javascript, both on the front-end and back-end, and a babel transpiler on the back-end translates server code to the ES6 standard.
It is very easy and possible to take code written on the front-end, and use that same code on the node server backend. The full stack is written in Javascript.
The value in standardizing programming to JavaScript is that your developers can work across the full stack without needed to constantly context switch. You don't need to hire a separate team to work on the front-end or the back-end, everyone can work on everything, because the code shared between the two is the same.
This ensures reduced costs, as you can train your developers to functionally work everywhere, instead of requiring lots of different languages to be learned.
8.1 Overview
In the root directory of Reeve, there is a folder called /shared/. This directory contains small snippets of code that have been imported on both the front-end and back-end environment, and are shared between the two.
Rather than duplicating the same code for both environments, the code is stored in a shared directory, and used by both systems accordingly.
This section of the documentation explores some of the shared types of information and code between the two systems.
8.2 Trials & Subscriptions
Subscriptions allow you to easily bill clients on a monthy basis. You can also leverage subscriptions as a way of offering certain application features on a multi-tiered payment arrangement.
Reeve by default, supports a subscription model. When a new user signs up for an account, they are placed onto a trial with a fixed period at which they can demo the product. Once the trial ends, they have to subscribe to continue.
You can adjust the default trial period of 14 days by modifying the following value.
							BILLING_CYCLE: {
								 TRIAL: 14,
								 BASIC: 28
							},
The default trial period is 14 days.
Once a trial account has been created, 4 columns in the client table are updated.
subscriptionId: A single integer value from the subscription table of the account type.
subscriptionStartDate: The start date of the subscription.
subscriptionEndDate: The end date of the subscription.
billingCycle: The frequency of billing (in days) from the start date.
On the front-end, all of these details are passed to the user object in Redux. You can easily take this information and display or hide elememts based on the type of subscription a client has.
							if (subscription === (user.get("subscriptionId")) {
								 return "value";
							}
*Where subscription is an integer value representing the same value as subscriptionId.
8.3 User Roles
Every user within Reeve can be assigned one or many roles. A role is a way of defining what an individual user is capable of doing when they interact with the application.
Typically, there may be an owner level role who can do everything, a financial role who can only update the billing system, and general users who can make changes to specific items at a restricted level.
The roles can be defined and modified within the roles table in the database.
Roles are mapped to users in a separate table called userRoles. As the mappings are based on user id and a role, it is possible to have many roles mapped to a single user. An individual user can assume the identity and perform the actions of many roles if needed.
Once again, the user roles are passed to the user object in Redux in an array.

You can easily take this information and display or hide elements based on the type of role a user has.
							if ((user.get("subscriptionId") && user.get("subscriptionId").contains(subscription)) {
								 return "value";
							}
To delete a role, you simply have to remove the mapping from the userRoles table.
8.4 Features
A feature is unique application functionality that can be enabled and disabled independently without the whole application breaking.
The value of this type of architectural structure includes; hiding functionality from the wider public until it is ready for mass adoption, and restricting functionality to a unique or priviledged group of users.
If one client is paying for a premium subscription compared to other clients, it is possible to offer more "features" to the greater paying client.
Features are defined in the table called features in the database. A feature is mapped to a subscription in the subscriptionFeatures table, in a many-to-many relationship. This means that you can restrict the availability of certain features to clients based on the subscription type they are currently paying for.
Features are passed to the user object in Redux in an array.

You can display or hide elements based on if a client has a feature, because of their subscription type.
							if ((user.get("clientFeatures") && user.get("clientFeatures").contains(feature)) {
								 return "value";
							}
8.5 Translations
Expanding a product to support a global market can be a very complex process. One way we have focused on making this experience easier is the introduction of translation strings.
Rather than a mixture of english throughout the application that prevents it from being accessible worldwide; the entire Reeve application has full translation support to handle any language you supply.
This has been made possible by abstracting text away from the pages themselves, and into JSON documents contained in the directory ./shared/translations/
Rather than hard-code a text value into a page. Call a function that references a value in the JSON documents, which translates the text on page render. Here's how it works:
The translations directory, contains 4 other directories. Languages, links, currencies and countries.
Each of these directories contain JSON language files in the structure - en.json, it.json etc.
							"label": {
								 "firstName": "First Name",
								 "lastName": "Last Name",
								 "emailAddress": "Email Address",
								 "password": "Password"
							}
To start displaying this string on either the front-end or the back-end, import the translation functions like so.
							import { t } from "shared/translations/i18n";

							t("components.authentication.workspaceName") // Example pointing to the JSON object string

							>> The function will output "workspacename"
When a user changes their language, the t() function will automatically pull the correct version of the language from the corresponding directory.
Language files are defined inside ./shared/translations/i18n.js
							en: {
								 translation: require("./languages/en.json"),
								 links: require("./links/en.json"),
								 countries: require("./countries/en.json"),
								 currencies: require("./currencies/en.json")
							},
There are a few other directories for different types of translation strings. These include links, countries, and currencies. They can all be imported and called using a different set of functions.
							import { l } from "shared/translations/i18n"; // Link
							import { co } from "shared/translations/i18n"; // Country
							import { cu } from "shared/translations/i18n"; // Currency
By default strings are pure text only. At times, you may want to render text on a page while also including html formatting. You can do so by appending the following post processor to your translation string like so.
t("components.authentication.workspaceModal.body", { postProcess: "markdown-jsx" })
9.0 Testing
Integration testing is a level of testing where components are combined together and tested as a group. Reeve provides inbuilt integration tests using the Ava testing framework.
To run the tests, make sure that the server is disabled, and simply run
npm run test
When ava is started, it puts the environment into a 'test' state where a limited server starts up. The front-end is not built.
At this point, a number of tests are performed against each of the endpoints defined in the router. The endpoints are called, and a response is returned and analyzed for accuracy.
All tests should pass successfully without fail. You may notice that in your database there are new clients and users that have been created; this is necessary to successfully perform the tests, as the database is not "mocked".
While some people could have an argument all day about the value of unit testing or integration testing. We've decided to leave it up to the user to define how their tests should work.
To build a basic test, do the following:
Create a new file in the directory ./tests_integration/ like so 02_xxxxxx_test_name_xxxxx.js
Import standard configuration properties to launch the server on test start.
							const test = require("ava");
							const uniqid = require("uniqid");
							const app = require("../server/server.js");
							const config = require("../config");

							let request = require("supertest");

							// Launch Server
							const server = app.listen();

							// Define default server path
							request = request(config.build.publicPath);
Create a new test with the 'test' function.
							test("New test name", async t => {
								 const response = await request.get("internal/endpoint_url/");
								 t.is(response.status, 403); // Check the response
							});
We recommend reading the following two pieces of documentation. The first is the Ava test runner documentation, and the second is the Supertest documentation, a utility for testing node HTTP servers.
10.0 Deployment
Reeve is a very simple node.js package that has been extensively tested on the major cloud application hosting providers.
If you understand their managed services at a basic level, you won't have any issues with deploying Reeve. We've focused on making the process as smooth and generic as possible, to work with each of the major providers.
Deploying node.js packages on Amazon Web Services
Deploying node.js packages on Azure
Deploying node.js packages on IBM CloudFoundry
This section will cover a basic deployment setup on Heroku.
Deploying to Heroku [Basic Guide]
Following opening an account on Heroku, select the 'Create new app' option from the drop-down menu.
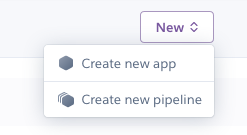
Enter a name for your project, and select a region you would like your application to be deployed to.
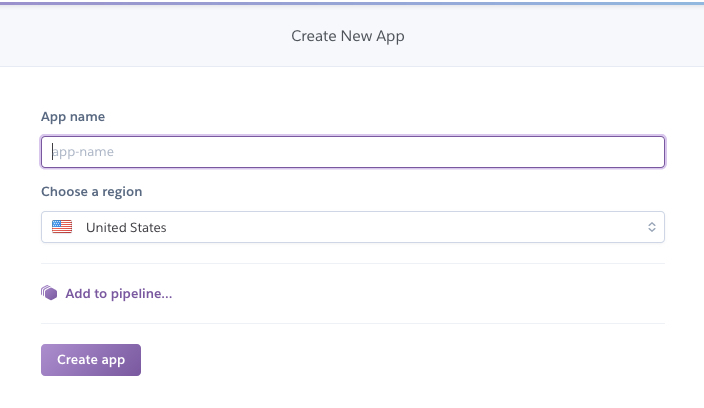
Once the new project has been created, select the 'Settings' tab at the top of the page.

Scroll down to the section called 'Config Vars,' and click the button 'Reveal Config Vars.' In this section, you want to populate the fields with all of the environmental variables specified in the config.env file in the root directory of the application.

Click the 'Deploy' tab at the top of the page.

Under the 'Deployment method' section. Connect to your repository using one of the available methods. In this instance, our application files are stored on GitHub.

Click the 'Deploy Branch' button in the 'Manual Deploy' section at the bottom of the page.

Heroku will fetch the application files from the repository, automatically pull the packages, install the application and launch the server. Easy!
11.0 Database Updates
We believe it important to establish good database management and development practices. A big part of this process involves knowing what changes have been made to the database and the impact of these changes.
In the directory ./database/scripts/ every new database change script is stored in a new sql file. When the script with the change is run, a record is stored in the executedScripts table in the database.
							INSERT INTO
							 `executedScripts` (`name`, `description`, `createdDate`, `executedDate`)
							VALUES
							 ('180601_01', 'Create new client styling table', NOW(), NOW());
The purpose of doing this is to keep a record of the changes so that if any database problems start occuring, you have a potential focus area to investigate.
This is a significantly safer option than changing the database with no proper record of the changes that have been made.
We recommend following similar practices when building your own application.
12.0 License
MIT License
Copyright (c) 2019 Peter Joseph
Permission is hereby granted, free of charge, to any person obtaining a copy of this software and associated documentation files (the "Software"), to deal in the Software without restriction, including without limitation the rights to use, copy, modify, merge, publish, distribute, sublicense, and/or sell copies of the Software, and to permit persons to whom the Software is furnished to do so, subject to the following conditions:
The above copyright notice and this permission notice shall be included in all copies or substantial portions of the Software.
THE SOFTWARE IS PROVIDED "AS IS", WITHOUT WARRANTY OF ANY KIND, EXPRESS OR IMPLIED, INCLUDING BUT NOT LIMITED TO THE WARRANTIES OF MERCHANTABILITY, FITNESS FOR A PARTICULAR PURPOSE AND NONINFRINGEMENT. IN NO EVENT SHALL THE AUTHORS OR COPYRIGHT HOLDERS BE LIABLE FOR ANY CLAIM, DAMAGES OR OTHER LIABILITY, WHETHER IN AN ACTION OF CONTRACT, TORT OR OTHERWISE, ARISING FROM, OUT OF OR IN CONNECTION WITH THE SOFTWARE OR THE USE OR OTHER DEALINGS IN THE SOFTWARE.
Written by Peter Joseph (contact@peterajoseph.com), 24th April 2019.